Commissioning CGI can be a major undertaking, especially if you are building a large, complex development. If you’ve never worked with The Pixel Workshop before, we thought it would be helpful to create a step-by-step guide of what to expect.
Step One: Consultation
This can be done in the form of a phone call, an on-line meeting or a face-to-face meeting.
We will talk to you about your development’s key features, including:
- Its location
- The number of houses or apartments you’re selling and their market value
- The USPs
- Any nearby competition
- Any issues you anticipate facing in terms of selling the properties (e.g. there is no public transport nearby).
We’ll ask you when you are planning to market, if you are marketing off plan, when the development will be ready to move into, and how you are planning to market. Who is your target market? What is the price point? If you can give us an idea of what your budget is, we will always do our best to reconcile this with as much CG imagery / animation as we can.
Sole-trader or national housebuilder – we adapt to your needs
We work with a range of clients, from the sole-trading house builder who has never commissioned CGI before through to national housebuilders such as Churchill Retirement Living, who need to reconcile the expectations of several departments (sales & marketing, design and technical) in order to make the right decisions on each CGI. That means we’re used to working with people who have never commissioned CG before, as well as people who are well-versed in the sorts of processes involved.
Why it helps to ask these questions
We want to make sure, from the outset, that the CGI package we create for you is the best balance of content to make sure you achieve your aims, whatever they are. Because we produce brochures and micro-sites to contextualise our images and animations, we’ll make sure you don’t order too many images, and by asking these in-depth questions it helps us make sure you’re getting the best value package possible.
Step Two: Quotation
We’ll send you a no obligation quotation, detailing the choices we’ve discussed and providing you with key starting points for CGI creation.
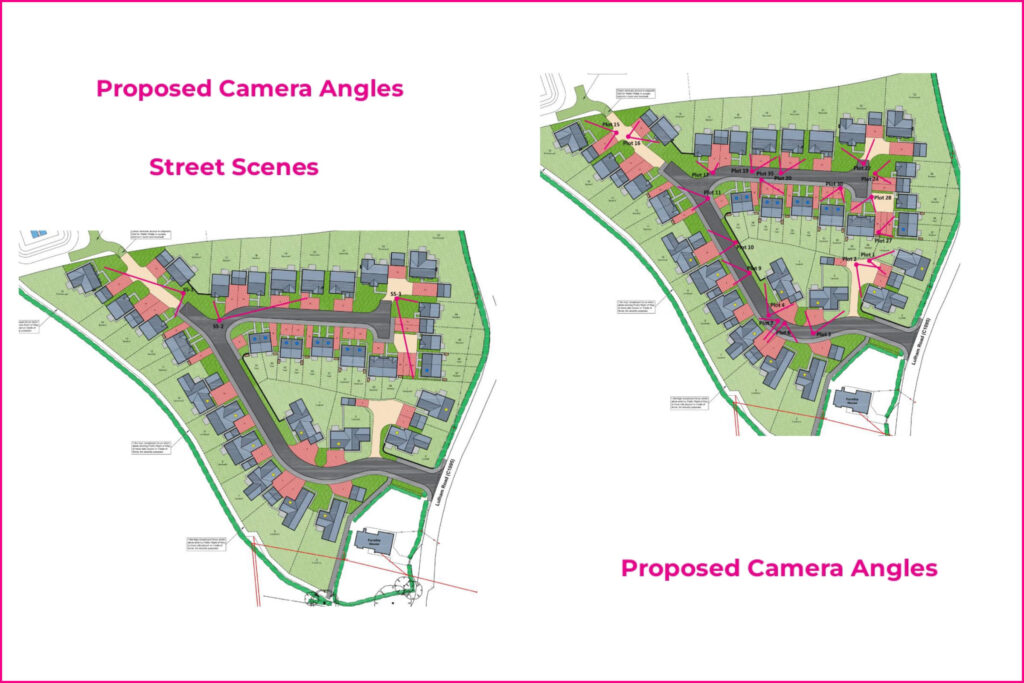
This is emailed across as a downloadable document. As well as pricing information, it contains pertinent examples. For interiors it will include previous CGIs we’ve created which we feel would suit your development, which we can use as a design template. It also includes proposed camera angles – after we receive your plans, our senior account manager, architect and creative lead will have a meeting to decide which shots and angles would best sell your development, based on the information you have told us. The angles are starting points, but they help you get a good idea of the images you’ll receive.
Step Three: Production begins
Once we have agreed on exactly which content will be produced, we’ll get your project booked into our studio.
We’ll need you to send us all necessary information to produce your images, animations and / or brochures – creating photo-real images and animations from 2D drawings can be a complex process – but after years of being in the business we’ve experienced all manner of possible issues and we’ve honed our systems to make sure everything runs as smoothly as possible.
Each project is carefully vetted first
Our architect will check through your drawings and materials references, and if there are any discrepancies, we’ll flag them up so any technical issues can get ironed out at the start. If you’re having trouble getting hold of any information, or you just haven’t decided on it yet, we’ll provide you with a choice of options we can incorporate instead.
Our entire process is designed to make sure you get the images you need, with the minimal amount of involvement required to achieve that goal.
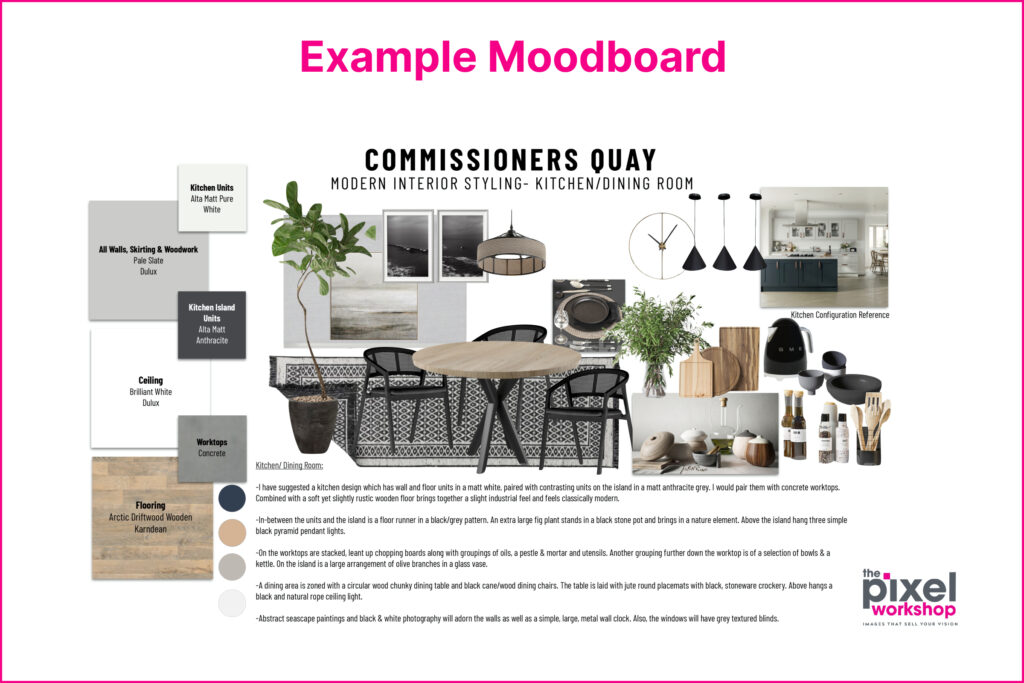
If we are producing interiors, we’ll arrange for a 15 minute meeting with our in-house stylist, who will nail the brief for each of the rooms we’re designing, so we can create moodboards for our artists to work from.
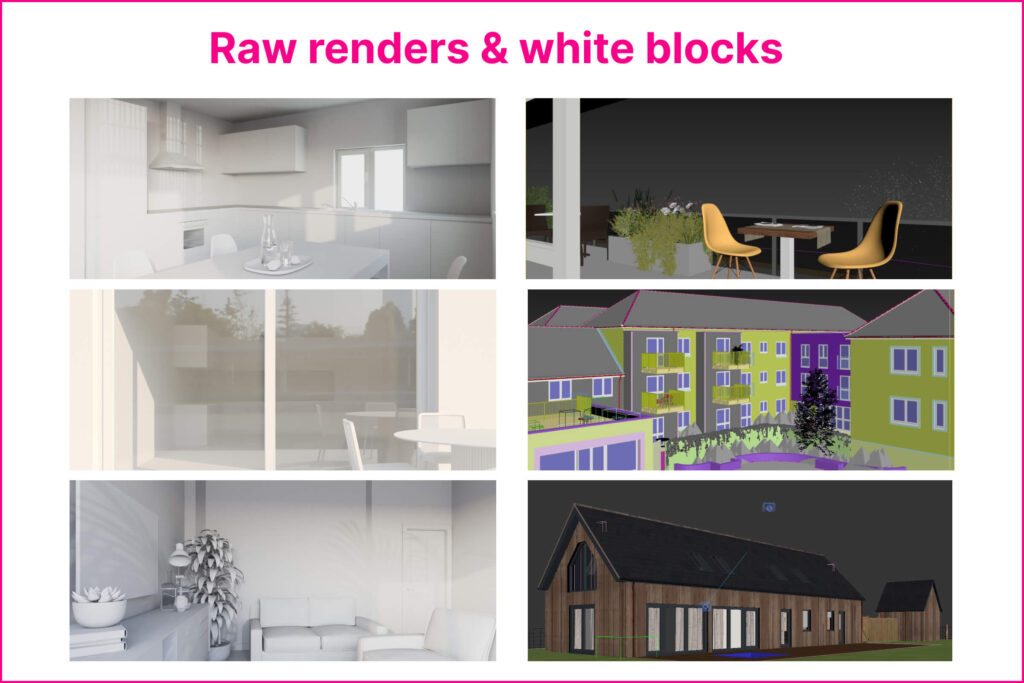
Step Four: Raw renders & white blocks
Raw renders are sometimes required when there are multiple options for angles, ensuring we choose the right ones.
For interiors you will recieve ‘white block’ versions of your images first to ensure that everything is correctly positioned and that all your USPs are included in the image.
In both cases, this is the stage where you will start to get an idea of how your final image will look and it’s a perfect point at which to make any technical changes that might be required.
Step Five: Low-resolution images
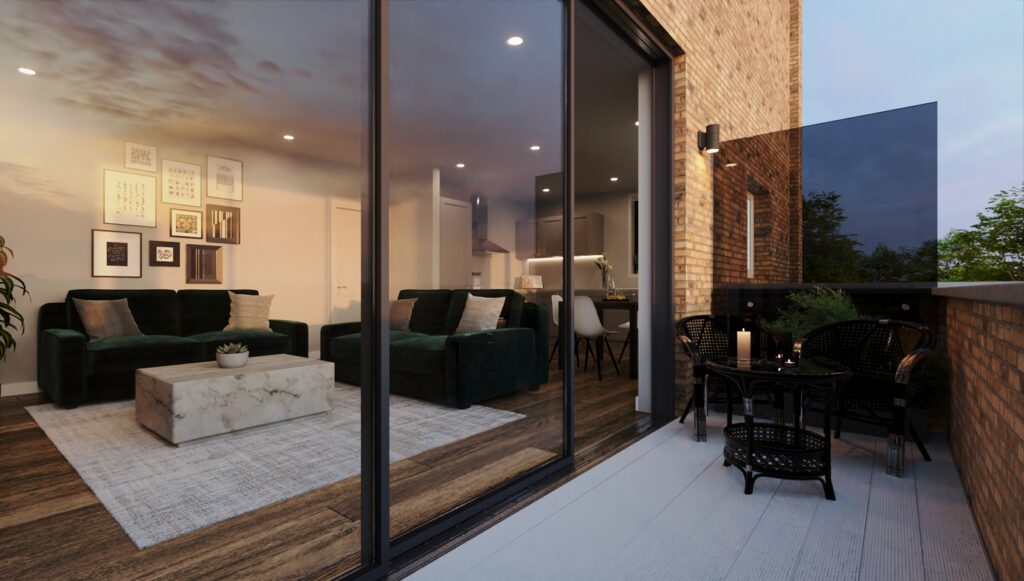
Once the best angles and furniture placement has been agreed, we will let you know when to expect the first low resolution drafts.
These will be full colour, fully textured images, 90% of the way to the finished images. At this stage we can still change colours and propping before you receive the final, high-resolution images.
What you can always expect from us
Responsiveness – we believe in excellent customer service and the first step to that is effective communication. There is always someone at the end of the phone who will understand your project and be able to answer any questons you may have.
Teamwork – we see yourselves as part of our team, working with you to achieve your goals and meet key deadlines.
Transparency – we will always be clear about what stage of the project we’re at and if we need anything else from you. We’re well-versed in striking an effective balance between enough client involvement to achieve your goals without adding to your workload too much. You’ve got enough on your plate getting the development out of the ground – our job is to take the stress out of crearting your marketing caollateral and making sure you get the content you need, when you need it.
